Halloween is the perfect excuse to get creative with your desserts—and there’s no treat more delightfully spooky than a Graveyard Chocolate Cake. This no-bake dirt dessert is a hit with kids and adults alike, combining layers of crushed Oreos, creamy pudding, and spooky toppings like gummy worms and edible tombstones. In this article, we’ll guide you through how to make a fun, flavorful, and frightfully easy graveyard dessert that’s perfect for parties, potlucks, or a cozy night in with scary movies. Let’s dive into the chocolatey dirt!
Creating Halloween Memories with Graveyard Chocolate Cake
Where spooky meets sweet nostalgia
When Halloween rolls around, there’s one dessert I always come back to—Graveyard Chocolate Cake. This no-bake showstopper isn’t just a treat; it’s a memory in the making. I still remember the first time I made it—layering pudding, cream cheese, and crushed Oreos while a plastic skeleton guarded the fridge. My little cousins squealed as they dug into the “grave dirt,” uncovering gummy worms and edible bones beneath the surface. That single dessert turned into a tradition—and honestly, a bit of an obsession.
What makes Graveyard Chocolate Cake such a hit every year is how it brings joy, flavor, and creativity all in one spooky package. It’s not just dessert—it’s decoration. You build edible tombstones out of Oreos, scatter candy pumpkins, and pipe ghostly details with melted white chocolate. It becomes a graveyard you get to eat—how cool is that?
This recipe has become a must for every Halloween party I host. It’s incredibly easy to make, especially when I’m also throwing together themed snacks like Spooky Spider Pretzel Mix or Halloween Harvest Snack Mix. The Graveyard Chocolate Cake always steals the show on the dessert table—it’s rich, chocolatey, creepy, and cool.

Why Graveyard Chocolate Cake is a Halloween staple
Besides being boo-tiful, it’s practical. This dessert requires zero baking, comes together quickly, and can be prepped in advance. It’s also easy to scale—make it in a trifle dish, 9×13 pan, or even single-serve cups for individual tomb plots. Kids love assembling the layers, and adults secretly love eating them even more.
Honestly, if there’s one dessert that captures Halloween in a bite, it’s Graveyard Chocolate Cake. It’s spooky, indulgent, and unforgettable—just like the holiday itself.
Step-by-Step Halloween Dirt Pudding Guide
Crafting the creamy chocolate base
To build the ultimate Graveyard Chocolate Cake, it all starts with the creamy, chocolatey pudding base. This no-bake dirt dessert layers rich textures for a spoonful that’s equal parts spooky and indulgent. Start by whisking together your chocolate instant pudding mix and milk. You’ll want to let that set slightly while you prepare the cream cheese layer—it’s what gives this dessert its signature fluff.
In another bowl, beat full-fat cream cheese with powdered sugar until smooth. Then, fold in freshly whipped heavy cream to make it light and airy. This layer adds tang and balance, making the chocolate shine without overwhelming sweetness. Once your pudding has thickened, gently combine it with the whipped cream mixture. This fusion of textures is what makes Halloween dirt pudding a fan favorite every single time.
Spread half the pudding mixture into your dish, then layer with a generous helping of crushed Oreos. Repeat the pudding and finish with even more crushed “dirt” on top. The cookies mimic fresh-turned soil—perfect for a haunted dessert. Need an alternate flavor twist? Try No Bake Lemon Blueberry Dessert for a bright, fruity version or No Bake Eclair Cake if you’re craving creamy vanilla layers instead.
How to decorate your edible graveyard
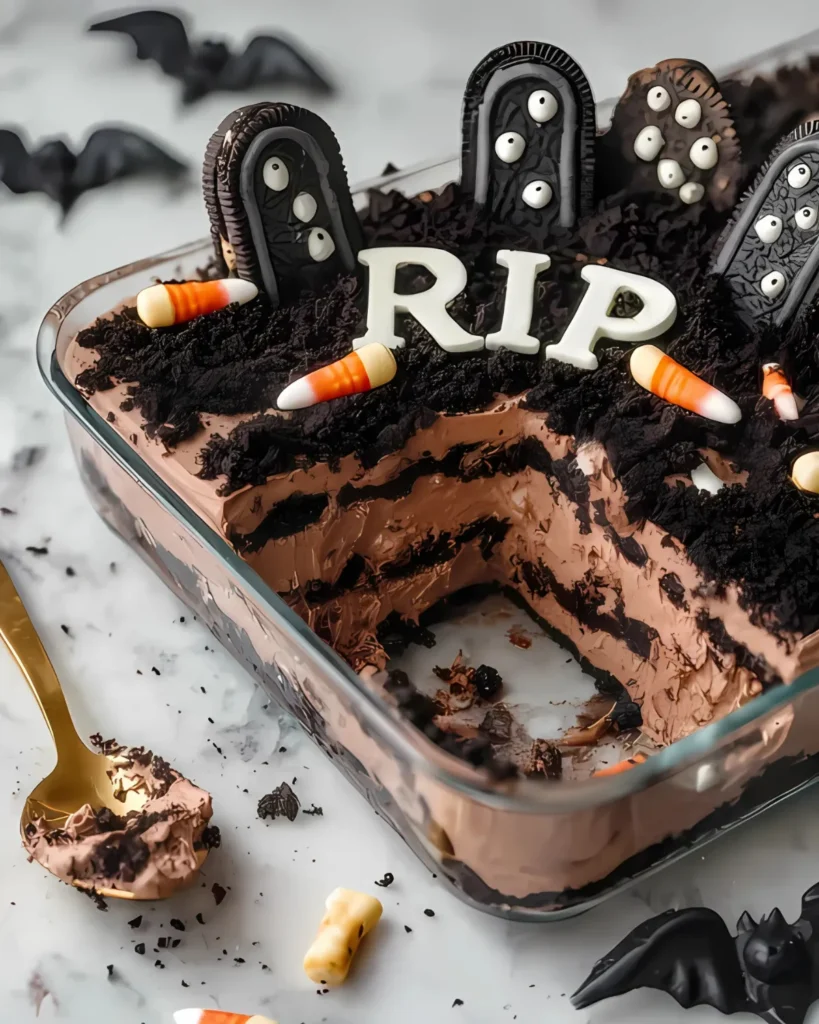
Now the real fun begins—turning this layered delight into a spooky cemetery scene. Split some extra Oreos in half and use the cream-free sides as tombstones. Melt white chocolate and pipe “RIP” or mini crosses on each. Place them into the cake upright, letting the Oreo “soil” support them.
Add gummy worms crawling from the graves and toss in Halloween candies like candy eyes or chocolate bones. You can even add crushed green candies or dyed coconut for a grassy look. There’s no wrong way to decorate a Graveyard Chocolate Cake—it’s all about creativity.
Make it ahead by refrigerating for up to 24 hours. In fact, the flavors deepen overnight, and the layers hold beautifully. This makes it a perfect prep-ahead dessert for parties, especially when paired with Cauliflower Mac and Cheese Pumpkins for a complete spooky spread.

Tips, Tricks & Variations for a Foolproof Graveyard Chocolate Cake
Make-ahead magic & serving strategies
One of the best things about Graveyard Chocolate Cake is how low-stress it is. This is a true no bake Halloween dessert, which means less time in the kitchen and more time enjoying your party. To make it ahead, assemble the full dessert the night before and store it in the refrigerator. The flavors meld beautifully, and the texture becomes even more luscious by serving time.
If you’re short on time, prep the layers separately a day in advance. Store the pudding-cream cheese mixture and crushed Oreos in airtight containers, then assemble and decorate the day of. For individual portions, build the cake in clear plastic cups or mini jars. This not only makes serving easier but also looks adorable on a Halloween dessert table.
Need to serve a crowd? Double the recipe and layer it in a large trifle dish or foil tray. Hosting a themed event? Create a haunted graveyard table with this dessert at the center, surrounded by creepy sides like Keto Halloween Deviled Eggs and Candy Corn Popcorn Mix.
Flavor swaps and spooky upgrades
While the classic Graveyard Chocolate Cake relies on chocolate pudding and Oreos, you can mix things up. Try using vanilla pudding dyed green with food coloring to create a “mossy” graveyard. Peanut butter lovers can fold some creamy peanut butter into the pudding layer for a Reese’s-inspired twist. Want an extra-chocolatey version? Use double chocolate Oreos or layer with chocolate ganache between pudding layers.
You can also switch up the candy décor depending on your theme. Candy eyeballs, skeleton hands, or even marshmallow ghosts make fun additions. For an upscale adult version, drizzle with dark chocolate and sprinkle with crushed espresso beans to create a spooky mocha dirt cake vibe.
And if you’re feeling creative, take inspiration from desserts like Pumpkin Pie Bars or Pumpkin Spice Truffles to add autumnal elements that give your cake a cozy seasonal twist. However you choose to build it, this dessert proves you don’t need a cauldron to make magic—just a few pantry staples and a whole lot of fun.
Kid-Friendly Fun, Allergy Swaps, and Presentation Ideas

A spooky dessert the whole family can make
The joy of making Graveyard Chocolate Cake isn’t just in the final reveal—it’s in the process. This is one of the easiest spooky desserts to involve kids in, making it a great bonding activity leading up to Halloween. Kids can crush Oreos, layer pudding, place gummy worms, and decorate tombstones with wild imagination. Let them personalize their “plots” with candy bones, sprinkles, or hand-drawn chocolate spiders. The more playful it gets, the better.
Hosting a Halloween playdate or classroom event? Pre-portion the ingredients so kids can assemble their own mini dirt pudding Halloween cups. It’s mess-free, customizable, and they’ll feel proud of their graveyard creations. Parents love that it’s fun without needing an oven, and kids love digging into “dirt” that tastes like dessert.
Pair this activity with a themed lunch or spooky snack board featuring treats like Keto Pumpkin Fat Bombs or Halloween Sausage Mummy Wraps to keep the festive spirit alive all day long.
Allergy-friendly and dietary swaps
It’s easy to adjust Graveyard Chocolate Cake for various dietary needs. Need a gluten-free version? Use certified gluten-free sandwich cookies and double-check your pudding mix. For dairy-free guests, swap in plant-based cream cheese and use coconut whipped cream with almond or oat milk for the pudding.
Sugar-conscious? Use sugar-free pudding mix and swap Oreos with a lower-sugar chocolate cookie alternative. You can also use natural gummy worms made without artificial dyes to keep the color spooky but safe.
Presentation-wise, a clear trifle bowl gives you a visual wow-factor that shows off all the delicious layers. For a party, try a coffin-shaped serving tray or mini cupcake liners for individual servings. You could even label your dessert table with little graveyard signs—“Worms & Dirt,” “Zombie Crumbs,” or “Ghost Guts”—for extra laughs.
However you present it, Graveyard Chocolate Cake is always a crowd-pleaser—cute enough for kids, creepy enough for adults, and tasty enough to disappear before the last tombstone falls.
FAQ About Graveyard Chocolate Cake
How do you make Halloween dirt pudding ?
Halloween dirt pudding is made by layering chocolate pudding (often mixed with whipped cream or cream cheese) and crushed chocolate sandwich cookies like Oreos. To give it a Halloween twist, you add spooky toppings such as gummy worms, cookie tombstones, and themed candies. It’s an easy no-bake dessert that’s perfect for parties and kids’ activities.
Can I use Jell-O pudding for dirt cake ?
Absolutely! Jell-O instant pudding works great for dirt cake recipes. Just make sure to use the instant version (not cook-and-serve), and chill the mixture until it sets. For Graveyard Chocolate Cake, chocolate-flavored Jell-O pudding delivers the perfect rich base for layering with Oreos and creepy candy décor.
How far in advance can you make dirt pudding ?
You can make dirt pudding up to 24 hours in advance. In fact, letting it chill overnight enhances the flavors and helps the layers set beautifully. Add candy decorations like tombstones or gummy worms closer to serving time to keep them looking fresh and upright.
What toppings go best on a graveyard chocolate cake ?
Great toppings for Graveyard Chocolate Cake include crushed Oreos for dirt, gummy worms, candy bones, edible eyes, mini pumpkins, and chocolate tombstones. You can also use white chocolate to write “RIP” on cookies or draw ghosts and crosses. Add green-colored coconut or crushed green candies for a “mossy” look.
There’s something wonderfully whimsical about building a dessert that looks like a haunted graveyard—and Graveyard Chocolate Cake hits all the marks. It’s rich, creamy, chocolatey, and completely no-bake, making it the perfect Halloween treat for any skill level. Whether you’re making it with your kids, prepping for a party, or just want to try something creative and creepy, this dirt dessert delivers unforgettable flavor and festive flair.
Best of all, it’s incredibly adaptable—play with flavors, toppings, and presentation to make it your own. So grab your mixing bowl, crush those Oreos, and get ready to make some deliciously spooky memories. Happy Halloween!
Need more recipes? Follow me on Pinterest.
Print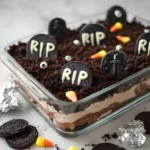
Graveyard Chocolate Cake – 5 Spooky Ideas You’ll Love
- Total Time: 20 minutes
- Yield: 8 servings
- Diet: Vegetarian
Description
This no-bake Graveyard Chocolate Cake is the perfect spooky treat for Halloween! With layers of pudding, crushed Oreos, and creepy candy decorations, it’s a hit for parties and kids alike.
Ingredients
▢310 g (2 cups) Oreos
▢50 g unsalted butter
▢1 packet chocolate instant pudding mix
▢275 ml milk (whole or semi-skimmed)
▢250 g cream cheese
▢70 g powdered icing sugar
▢125 ml heavy cream
▢Optional: more Oreos, white chocolate, gummy worms, Halloween candy
Instructions
1. Crush Oreos into fine crumbs and mix with melted butter.
2. Whisk pudding mix and milk until thickened.
3. In another bowl, beat cream cheese with icing sugar until smooth.
4. Whip the cream and fold into the cream cheese mixture.
5. Combine pudding with cream cheese mix.
6. Layer half the Oreo crumbs in dish, then add pudding mix, then remaining crumbs.
7. Decorate with Oreo tombstones, gummy worms, and candy.
Notes
Make ahead and refrigerate for up to 24 hours.
Use individual cups for serving.
Decorate just before serving for best visuals.
- Prep Time: 20 minutes
- Cook Time: 0 minutes
- Category: Dessert
- Method: No Bake
- Cuisine: American
Nutrition
- Serving Size: 1 slice
- Calories: 395
- Sugar: 26g
- Sodium: 310mg
- Fat: 21g
- Saturated Fat: 12g
- Unsaturated Fat: 6g
- Trans Fat: 0g
- Carbohydrates: 45g
- Fiber: 2g
- Protein: 5g
- Cholesterol: 65mg


2 thoughts on “Graveyard Chocolate Cake – 5 Spooky Ideas You’ll Love”
Comments are closed.