Introduction :
This Flaky Roti Canai Recipe brings the magic of Malaysian food straight into your kitchen. If you love crispy, buttery flatbreads with soft, stretchy layers inside, this roti canai recipe will quickly become your favorite. In this guide, I’ll show you exactly how to prepare homemade roti dough, stretch it properly, and cook it for irresistible flakiness. Whether you’re exploring Malaysian food for the first time or recreating a street food favorite, this flaky roti canai recipe delivers authentic texture and flavor. Let’s break down the process step by step so you can master it with confidence.
Flaky Roti Canai Recipe – A Malaysian Street Food Favorite
Why This Roti Canai Recipe Is So Special
The first time I tasted a flaky roti canai recipe at a Malaysian café, I couldn’t stop thinking about those delicate layers. I remember pulling apart the bread and watching the steam rise from inside. That moment inspired me to recreate this roti canai recipe at home.
Roti canai stands out because it combines crisp edges with a soft, stretchy interior. Unlike a basic roti recipe, this version uses oil layering and long resting periods to create visible flaky sheets. As a result, every bite feels buttery and light.
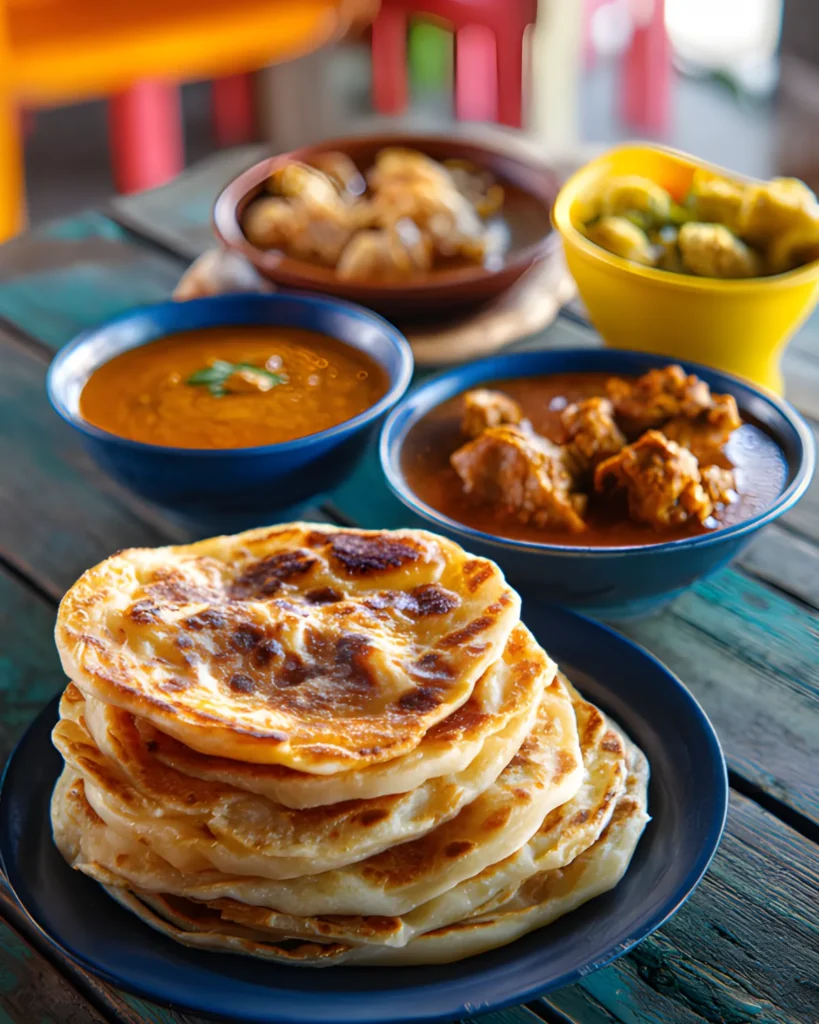
Moreover, this flaky roti canai recipe fits perfectly into breakfast, lunch, or dinner. Traditionally, Malaysians serve it with dhal curry, chicken curry, or sugar. However, you can also pair it with dishes like creamy coconut-based curries similar to those featured in our Malaysian-style curry recipes at FlavorsofRecipes.
Because technique matters, you must focus on dough hydration and resting time. Once you master these steps, your homemade roti preparation becomes surprisingly simple.
The Secret Behind Flaky Layers
So what creates those irresistible layers in a flaky roti canai recipe?
First, hot water partially cooks the flour. Then room temperature water completes hydration. This combination strengthens gluten while keeping the dough soft.
Next, oil coating plays a crucial role. You coat each dough ball generously in oil and let it rest for hours. During this resting period, gluten relaxes completely. Consequently, you can stretch the dough paper-thin without tearing it.
Finally, you fold the stretched sheet into layers before cooking. This folding traps thin sheets of dough between light coatings of oil. As the roti cooks, steam forms between layers. That steam pushes layers apart and creates flakiness.
If you’ve ever made layered flatbreads like paratha, you’ll notice similarities. However, this roti canai recipe relies more heavily on extended resting. Therefore, patience transforms good dough into spectacularly flaky bread.
In the next section, we’ll break down homemade roti preparation step by step so you can build the perfect dough foundation.
If you love homemade breads, explore our easy naan bread recipe
Homemade Roti Preparation – Dough, Resting & Stretching
How to Prepare Soft and Elastic Roti Dough
A successful flaky roti canai recipe always begins with proper homemade roti preparation. Although the ingredient list looks simple, technique determines the final texture.
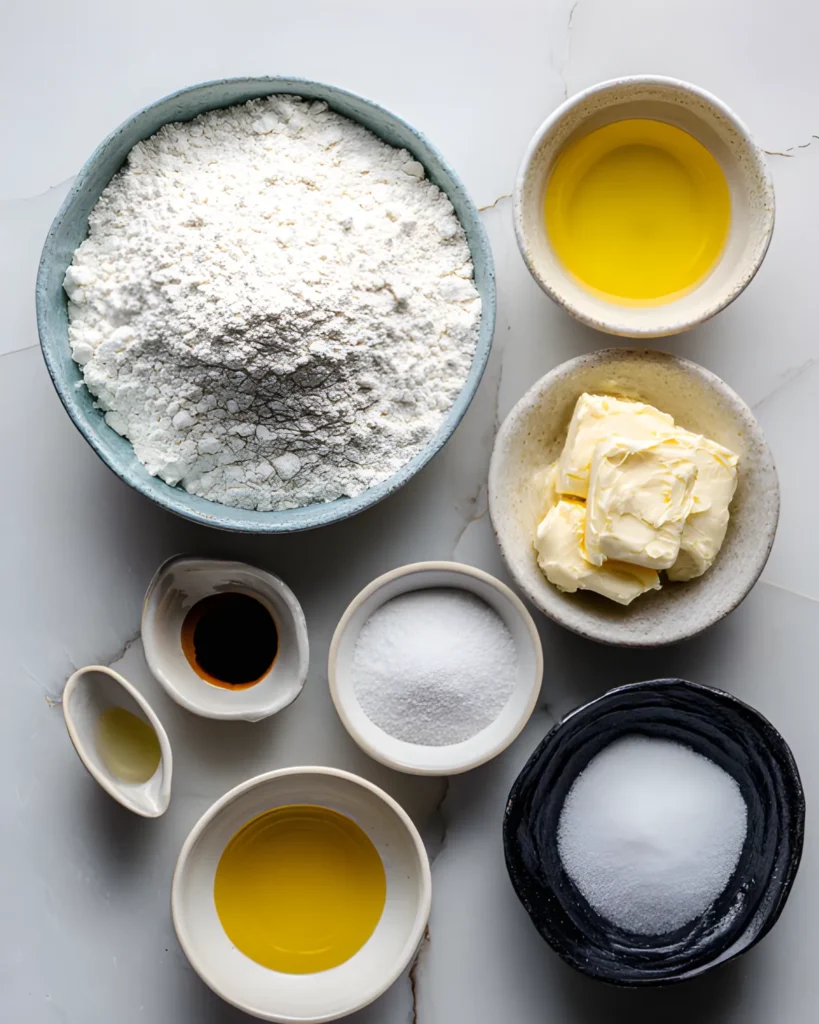
First, combine 500 g all-purpose flour and sea salt in a large bowl. While stirring, slowly add boiling water. The hot water forms clumps and starts gluten activation immediately. Then, add room temperature water and mix with your hands until you create a soft, scraggly dough.
At this stage, the dough should feel pliable but not sticky. If it sticks excessively, sprinkle a tiny amount of flour. However, avoid over-flouring because dry dough prevents proper stretching later.
After mixing, cover the bowl and let it rest for 30 minutes. This resting period allows the flour to hydrate completely. As a result, kneading becomes easier and more effective.
Next, knead for 2–3 minutes until the surface turns smooth and satiny. Divide the dough into 8 equal portions (about 90–100 g each). Shape them into smooth balls.
Now comes a crucial step: coat each ball generously with oil. Place them on an oiled plate and cover tightly. Let them rest at least 2 hours, although overnight resting produces even better elasticity. This long rest separates a good roti recipe from an exceptional flaky roti canai recipe.
For more dough-based techniques, you can explore other flatbread guides in our homemade bread recipes collection and similar Malaysian food inspirations available on FlavorsofRecipes.

Understanding Resting Time and Gluten Development
Resting transforms your dough completely. Gluten strands relax during this period, which allows dramatic stretching without tearing.
Here’s a quick breakdown:
| Resting Time | Result |
|---|---|
| 30 minutes | Basic hydration, easier kneading |
| 2 hours | Elastic, stretchable dough |
| Overnight (8–12 hrs) | Maximum pliability and flakiness |
Because gluten relaxes gradually, longer resting always improves results. Therefore, if time allows, prepare the dough the night before cooking.
In the next section, we’ll focus on stretching, folding, and cooking techniques that create those iconic flaky layers.
Roti Canai Cooking Techniques for Perfect Layers
Stretching, Folding, and Layering Like a Pro
Now that your dough has rested properly, your flaky roti canai recipe truly comes to life. Because the dough is well-oiled and relaxed, you can stretch it thin without tearing.
First, lightly oil your work surface. Then place one dough ball in the center. Using your fingers, gently flatten it. Next, stretch the dough outward from the center. Keep rotating and pulling carefully. The goal is to create a paper-thin sheet — thin enough to almost see through.
If small holes appear, don’t panic. Minor tears won’t ruin your roti canai recipe. In fact, they often happen during proper stretching.
Once stretched thin, lightly drizzle a few drops of oil or melted butter over the surface. Then fold the dough inward. You can fold it envelope-style or roll it into a loose spiral. Both methods create layers.
After folding, flatten the dough gently into a round disc. Avoid pressing too hard because you want to preserve air pockets between layers. Those air pockets create the flakiness that defines an authentic flaky roti canai recipe.
If you enjoy layered breads like naan, you might also love experimenting with soft flatbreads such as those in our homemade skillet bread recipes, which use similar stretching principles.
Homemade Roti Cooking Tips for Crispy Results
Now let’s cook your roti properly.
Heat a flat skillet or griddle over medium heat. Do not rush this step. A properly heated pan ensures even cooking and golden spots.
Place the flattened dough on the pan. Cook for about 1–2 minutes until bubbles appear. Then flip it. Add a small amount of oil or ghee around the edges.
As it cooks, gently press the surface with a spatula to encourage even browning. However, avoid smashing it flat. Press lightly and strategically.
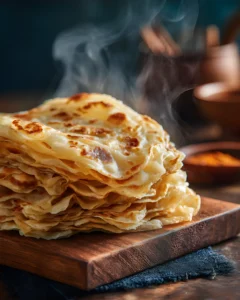
Cook both sides until golden brown with crisp edges. You should see visible layered flakes separating slightly.
Once cooked, remove it from the heat. While still warm, lightly clap the roti between your hands. This technique separates layers further and enhances flakiness. Street vendors often use this step to perfect their flaky roti canai recipe texture.
If you want to pair your roti with comforting sides, explore Malaysian food classics or curry pairings in our global comfort food collection at FlavorsofRecipes.
In the next section, we’ll explore homemade roti with herbs and spices, plus how this differs from rumali roti.
Variations – Homemade Roti With Herbs and Spices
Flavor Variations and Malaysian Food Pairings
Once you master the flaky roti canai recipe, you can easily experiment with flavor. Because the base dough remains neutral, it pairs beautifully with herbs and spices.
For homemade roti with herbs, finely chop cilantro, parsley, or green onions. Sprinkle them over the stretched dough before folding. As the roti cooks, the herbs release aroma and add vibrant flavor.
If you prefer homemade roti with spices, dust the stretched dough lightly with cumin, coriander powder, or chili flakes before folding. However, use spices moderately. Too much filling prevents proper layering.
You can also brush melted butter mixed with minced garlic between folds for a bold variation. This technique enhances richness while preserving flakiness.
Traditionally, Malaysians serve roti canai with dhal curry or chicken curry. However, you can also serve it with sugar for breakfast or alongside savory gravies. If you enjoy exploring global breads, you might also love pairing this roti recipe with dishes from our Asian-inspired dinner collection or alongside comforting stews featured in our hearty meal recipes at FlavorsofRecipes.
Because this flaky roti canai recipe balances crisp edges with soft layers, it works equally well as a side or standalone dish.
How to Make Rumali Roti at Home vs Roti Canai
Many people ask how to make rumali roti at home and whether it resembles roti canai. While both are flatbreads, they differ significantly in technique and texture.
Rumali roti uses no layering or oil resting. Instead, you stretch the dough extremely thin and cook it quickly on an inverted hot surface. It remains soft and foldable without crisp layers.
In contrast, a flaky roti canai recipe focuses on oil layering and long resting. That process creates steam pockets and visible flakes.
Here’s a quick comparison:
| Feature | Roti Canai | Rumali Roti |
|---|---|---|
| Layering | Yes | No |
| Texture | Flaky & Crisp | Soft & Flexible |
| Resting Time | Long (2–12 hrs) | Short |
Therefore, while both fall under the roti recipe family, the flaky roti canai recipe requires more patience but rewards you with signature crisp layers.
Discover more homemade bread recipes in this collection
FAQ Section
- Why is my roti canai not flaky?
Your dough likely did not rest long enough. Additionally, insufficient oil layering prevents steam pockets from forming. Always allow at least 2 hours of rest for proper gluten relaxation. - Can I make roti canai without overnight resting?
Yes. Although overnight resting improves elasticity, a minimum of 2 hours still produces good results for this flaky roti canai recipe. - Can I use whole wheat flour instead of all-purpose flour?
You can substitute partially, but whole wheat creates denser layers. For best flakiness, use mostly all-purpose flour. - How do I store leftover roti canai?
Cool completely, stack with parchment between layers, and refrigerate. Reheat on a skillet to restore crispness.
Conclusion
This flaky roti canai recipe proves that simple ingredients can create extraordinary texture. With proper homemade roti preparation, generous oil coating, and patient resting, you can recreate authentic Malaysian food in your own kitchen. Although technique requires practice, each batch improves your confidence. So take your time, stretch gently, and cook with intention. Soon, you’ll master this beautifully layered roti recipe and enjoy crisp, buttery flatbread whenever you crave it.
Print
Flaky Roti Canai Recipe – Ultimate 5-Step Authentic Guide
- Total Time: 3 hours 15 minutes
- Yield: 8 rotis 1x
- Diet: Vegetarian
Description
This flaky roti canai recipe creates crispy golden layers with a soft interior. Authentic Malaysian technique with simple pantry ingredients.
Ingredients
500 g all purpose flour (about 4 cups, spoon and level method)
1 tsp sea salt
180 mL boiling water (¾ cup)
180 mL room temperature water (¾ cup)
Oil for coating, layering, and cooking
Butter or ghee (optional)
Instructions
1. In a large bowl, combine flour and salt.
2. Add boiling water while stirring to form clumps.
3. Add room temperature water and mix until a soft dough forms.
4. Cover and rest for 30 minutes.
5. Knead 2–3 minutes until smooth and satiny.
6. Divide into 8 equal portions and shape into smooth balls.
7. Coat each ball generously with oil and place on oiled plate.
8. Cover and rest at least 2 hours or overnight.
9. Stretch each dough ball thin on oiled surface.
10. Fold into layers and flatten gently.
11. Cook on medium heat skillet 1–2 minutes per side until golden.
12. Lightly clap between hands to enhance flakiness before serving.
Notes
Longer resting time improves elasticity and flakiness.
Do not over-flour dough.
Cook on medium heat for best crisp layers.
Serve with curry or sugar.
- Prep Time: 3 hours
- Cook Time: 15 minutes
- Category: Breakfast
- Method: Skillet
- Cuisine: Malaysian
Nutrition
- Serving Size: 1 roti
- Calories: 210
- Sugar: 1g
- Sodium: 180mg
- Fat: 6g
- Saturated Fat: 1g
- Unsaturated Fat: 4g
- Trans Fat: 0g
- Carbohydrates: 34g
- Fiber: 1g
- Protein: 5g
- Cholesterol: 0mg