Introduction
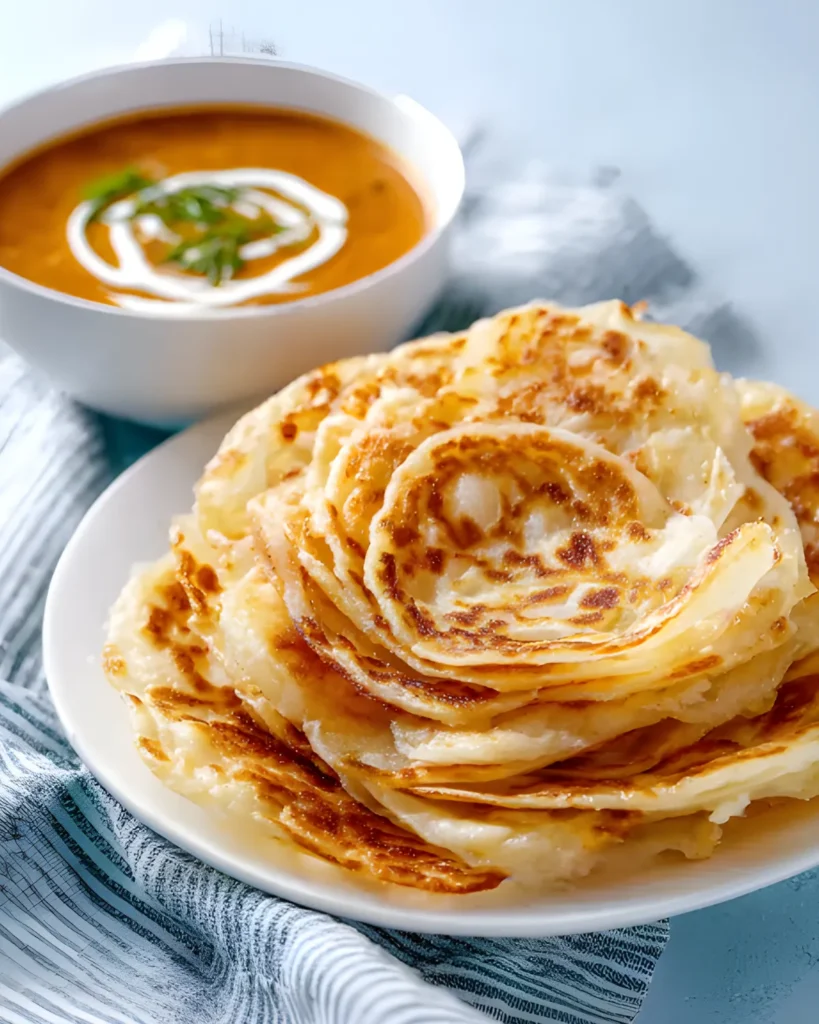
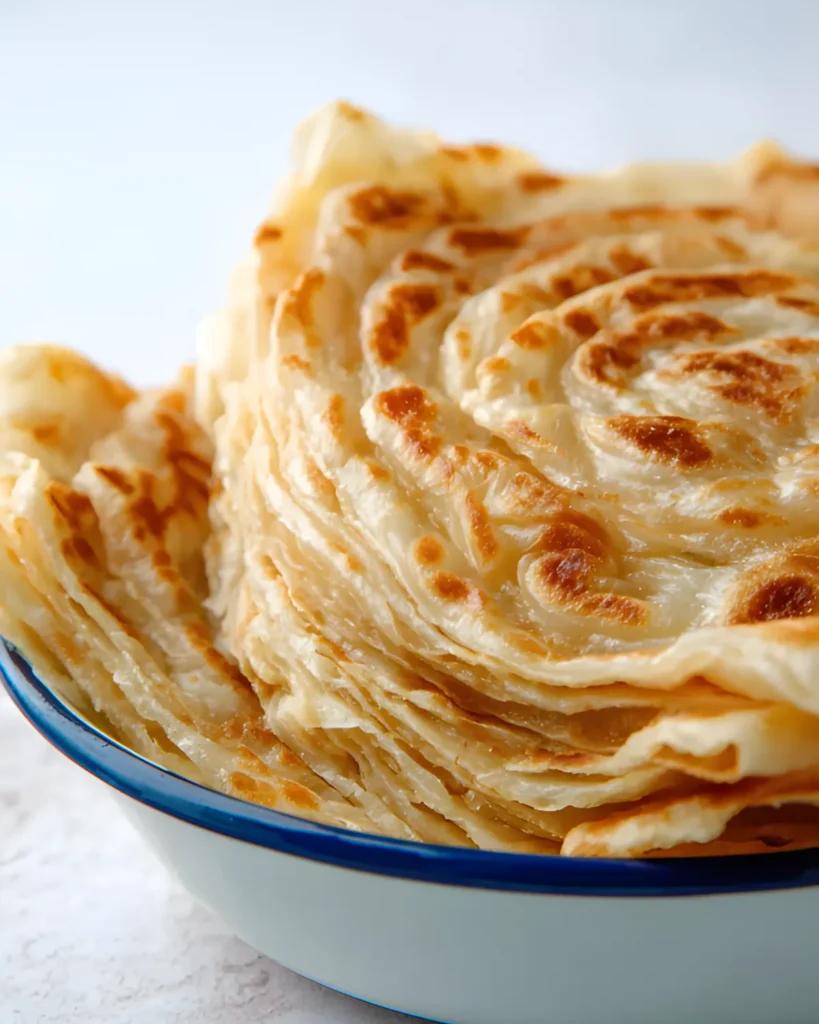
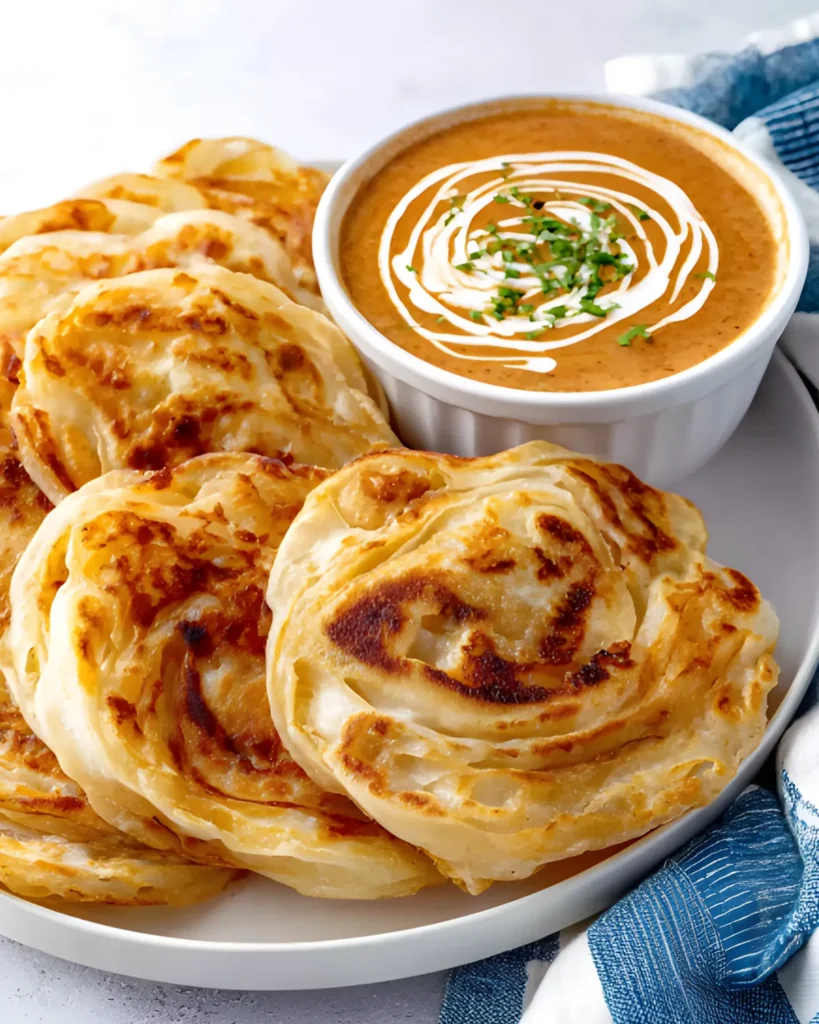
Roti Canai, often referred to as Malaysian flatbread, is a beloved dish in Malaysia and beyond. Its crispy, flaky layers and soft interior have made it a popular choice for breakfast, lunch, and dinner. Whether paired with dhal (lentil curry), chicken curry, or just enjoyed on its own with a drizzle of sugar, Flaky Roti Canai is a comfort food like no other.
This guide will walk you through how to create this iconic flatbread at home. You’ll learn the traditional way of preparing flaky roti canai, the history and origin of the dish, and essential tips and tricks to perfect your technique. From mastering the dough to shaping the perfect layers, this article will ensure your homemade Roti Canai is just as delicious as the ones you get at your favorite Malaysian restaurant.
The Story Behind Roti Canai: A Cultural Icon
Origins of Roti Canai
Roti Canai has its roots in Indian cuisine, brought to Malaysia by Indian Muslims (also known as “mamasans”) centuries ago. The term “roti” simply means bread in Hindi and Urdu, while “canai” is derived from the Indian city of Chennai (formerly Madras), where a similar type of flatbread, called paratha, is commonly eaten.
This flatbread is popular across South Asia, but it gained significant recognition in Malaysia and Singapore, where it evolved into a dish that reflects the country’s multicultural influences. Over the years, Roti Canai became a street food staple, served at mamak stalls and eaten at any time of day, from breakfast to late-night snacks.
Cultural Significance
In Malaysia, Roti Canai is not just a dish—it’s a symbol of the country’s cultural diversity. This flatbread, which has origins in India, is now part of the everyday life of Malaysians, with variations and unique twists on the traditional recipe. Whether you enjoy it with curry, or with a sprinkle of sugar, Roti Canai has become deeply ingrained in the culture.
At Malaysian mamak stalls, it is often eaten with dhal (lentil curry), chicken curry, or a range of spicy curries, but it’s also common to see people enjoying it simply with a cup of Teh Tarik (Malaysia’s famous pulled tea). The versatility and adaptability of Roti Canai make it the perfect canvas for an array of accompaniments, both savory and sweet.
Why is Roti Canai So Popular?
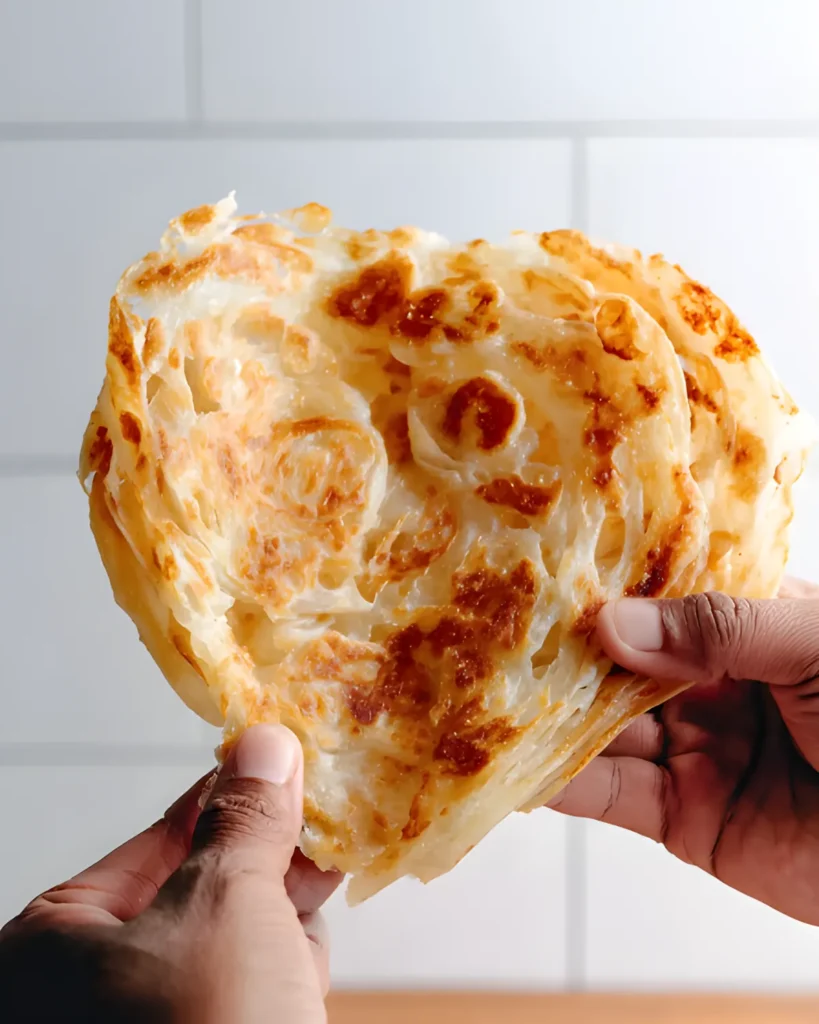
Roti Canai’s popularity lies in its texture. The bread is thin, crispy on the outside, and soft on the inside. This unique combination of textures makes each bite satisfying. The beauty of this flatbread is that it is not only delicious, but it can be paired with so many different dishes, making it a go-to food in any household.
Unlike many breads that require specialized ovens or advanced techniques, Roti Canai can be made in a simple skillet, which makes it accessible for home cooks. With practice, anyone can master the technique of stretching the dough to create those coveted flaky layers.
Ingredients You Need for the Perfect Flaky Roti Canai
To make perfect Flaky Roti Canai, you need a few essential ingredients that come together to form the dough and create that signature texture. This recipe is both simple and versatile, and you likely have most of the ingredients at home already.
Key Ingredients:
- 500 g all-purpose flour (about 4 cups)
- 1 tsp sea salt
- 180 mL boiling water (¾ cup)
- 180 mL room temperature water (¾ cup)
- Oil (for coating, layering, and cooking)
- Butter or ghee (optional for added richness)
The Importance of Each Ingredient:
1. All-Purpose Flour
Flour is the backbone of this recipe, and using all-purpose flour gives the dough its elasticity. The flour also forms the foundation of the layers in Roti Canai, allowing it to stretch without tearing.
2. Sea Salt
Salt isn’t just for flavor; it helps control the moisture balance in the dough. It also ensures that the Roti Canai isn’t too bland when enjoyed with curry or other dips.
3. Boiling Water & Room Temperature Water
The combination of boiling water and room temperature water helps hydrate the flour to form a soft, elastic dough. The hot water helps dissolve the flour and makes the dough easier to work with, while the room temperature water balances the hydration process, ensuring the dough isn’t too sticky or too dry.
4. Oil & Butter/Ghee
Oil is used throughout the process to coat the dough and the pan. It helps create the thin layers that make Roti Canai flaky. Butter or ghee adds richness and flavor, though it’s optional.
Step-by-Step Instructions for Roti Canai
Making Flaky Roti Canai from scratch is a process that requires patience, but the results are worth the effort. Follow this detailed guide to ensure every step is executed perfectly.
Step 1: Prepare the Dough
- Mix Flour and Salt: In a large mixing bowl, combine 500 g of all-purpose flour and 1 tsp sea salt. Stir to mix.
- Add Boiling Water: Gradually add 180 mL of boiling water to the flour mixture, stirring constantly with a spatula. The hot water will cause the flour to form clumps. Continue mixing until you have smaller clumps of dough.
- Add Room Temperature Water: Once the hot water has been incorporated, add the remaining 180 mL of room temperature water and mix with your hands. You want the dough to be soft but not sticky.
- Rest the Dough: Once combined, cover the bowl with plastic wrap and let the dough rest for 30 minutes to 1 hour. This allows the gluten to develop and makes the dough easier to handle.
Step 2: Knead and Divide the Dough
- Knead the Dough: After resting, knead the dough for 2–3 minutes until it becomes smooth and elastic.
- Divide the Dough: Weigh the dough and divide it into 8 equal portions (about 90-100g each).
- Form Dough Balls: Roll each portion into a smooth ball. Coat each ball lightly with oil to prevent them from sticking, and place them on a plate with some space in between.
Step 3: Rest the Dough Again
- Cover the Dough Balls: Cover the plate with plastic wrap and let the dough rest for at least 2 hours, or ideally overnight. This extended rest period ensures that the dough becomes more pliable, making it easier to stretch when forming the roti.
Step 4: Stretch and Shape the Roti
- Flatten the Dough: After the dough has rested, take one dough ball and flatten it on a smooth surface using your palms. Gently stretch the dough outwards using your fingers until it is paper-thin. The goal is to stretch the dough evenly without tearing.
- Apply Oil/Ghee: Brush a light layer of oil or ghee on top of the stretched dough. This helps form the layers that give Roti Canai its signature flakiness.
- Roll the Dough: Roll the stretched dough into a tube. Once it is tightly rolled, coil the tube into a spiral. Press the ends down to seal.
Step 5: Cook the Roti Canai
- Heat the Pan: Heat a non-stick pan or tawa over medium heat. Add a little oil to the pan.
- Cook the Roti: Take one coiled dough ball and flatten it into a 6–7 inch round shape using your palms. Place it in the pan and cook for about 2 minutes or until the bottom is golden brown. Flip the roti and cook the other side.
- Repeat the Process: Continue with the remaining dough portions. Be sure to flip the roti regularly for even cooking and golden brown texture.
- Cool the Roti: After cooking, place the roti on a cooling rack. Once it’s still hot, gently clap it between your palms to separate the layers, making the roti flaky.
Serving Roti Canai: Tips and Variations
Best Ways to Serve Roti Canai
Flaky Roti Canai is incredibly versatile and can be served with a variety of dips, curries, and side dishes. Here are some of the most popular ways to enjoy it:
- With Dhal (Lentil Curry): This is the classic pairing. The earthy, spiced flavor of dhal complements the crispy roti.
- With Chicken or Beef Curry: The rich, flavorful curries are perfect with roti canai. The bread absorbs the curry sauce, creating an unforgettable taste.
- With Sugar: If you’re craving something sweet, sprinkle sugar over the roti for a simple, satisfying snack.
Variations
- Herbed Roti Canai: Add finely chopped herbs like cilantro or mint to the dough for an aromatic twist.
- Stuffed Roti Canai: For a heartier meal, stuff the dough with spiced potatoes or minced meat before cooking.
FAQs about Roti Canai
Q1: Can I make Flaky Roti Canai without ghee or butter?
Yes, you can make Roti Canai with just oil. Ghee or butter adds extra richness, but they are optional.
Q2: Can I freeze Roti Canai dough?
Yes, you can freeze the dough balls. Just coat them with oil, wrap them in plastic, and store them in the freezer. When ready to use, let them thaw and then proceed with the recipe.
Q3: How do I get Flaky Roti Canai to be extra flaky?
To get your roti extra flaky, make sure to stretch the dough as thin as possible and apply a light coating of oil between the layers.
Q4: Can I make Roti Canai without special equipment?
Absolutely! All you need is a flat surface and a non-stick pan or tawa. The technique may take some practice, but it’s achievable with just a few basic tools.
Conclusion
Flaky Roti Canai is a true testament to the beauty of simple ingredients and traditional cooking techniques. The crispy, flaky layers and soft interior create a delightful balance of textures that make this dish a favorite among food lovers around the world. Whether served with savory curries or enjoyed with a touch of sugar, Roti Canai is sure to become a cherished part of your culinary repertoire.
With a little patience and practice, you’ll be able to perfect this dish and enjoy a homemade Malaysian delight right in your kitchen.

7 Steps to Perfect Flaky Roti Canai – Easy, Crispy Recipe You Must Try
Description
Flaky Roti Canai made with simple ingredients like flour, water, and oil to create a crispy, buttery flatbread that’s perfect for curries or as a snack.
Ingredients
500 g all-purpose flour
1 tsp sea salt
180 mL boiling water
180 mL room temperature water
Oil for coating, layering, and cooking
Butter or ghee (optional)
Instructions
1. Mix flour and salt in a large bowl.
2. Gradually add boiling water and stir until clumps form.
3. Add room temperature water and mix until soft dough forms.
4. Rest the dough for 30 minutes to 1 hour.
5. Knead the dough until smooth, then divide into 8 portions.
6. Roll each dough portion into balls and coat with oil.
7. Let the dough balls rest for 2 hours or overnight.
8. Flatten and stretch one dough ball into a thin sheet.
9. Brush with oil or ghee, roll into a tube, and coil into a spiral.
10. Cook on medium heat in a non-stick pan until golden brown on both sides.
11. Serve hot with curry or sugar.
Notes
Resting the dough overnight makes it more pliable.
For extra richness, use ghee or butter when cooking.
Ensure the pan is at medium heat for even cooking.