The Story & Spider Chocolate Crinkle Cookies Basics
A Halloween Memory Baked into Chocolate Crinkles
I still remember the first time I made Spider Chocolate Crinkle Cookies—it was for a last-minute Halloween party at my niece’s school. The challenge was to bring something spooky but simple, and I didn’t have hours to spend in the kitchen. That’s when I discovered that a classic chocolate crinkle cookies recipe could turn into a crowd-pleasing treat with just a few fun decorations. The cracked surface of crinkle cookies already looks festive, almost like a spiderweb, so adding chocolate truffle “bodies” and candy eyeballs made the transformation effortless. The kids loved them, and parents kept asking how something so fun could be so easy. Since then, Spider Chocolate Crinkle Cookies have become my go-to for every Halloween gathering.
These cookies strike the perfect balance between nostalgic comfort and playful creativity. They’re chewy in the middle, slightly crisp on the edges, and packed with chocolate flavor that appeals to kids and adults alike. Even better, they don’t require professional decorating skills—anyone can make them look spooky and adorable. Whenever October rolls around, I find myself reaching for this recipe because it blends tradition with seasonal fun in a way that never disappoints.

Why Chocolate Crinkle Cookies Make the Best Base
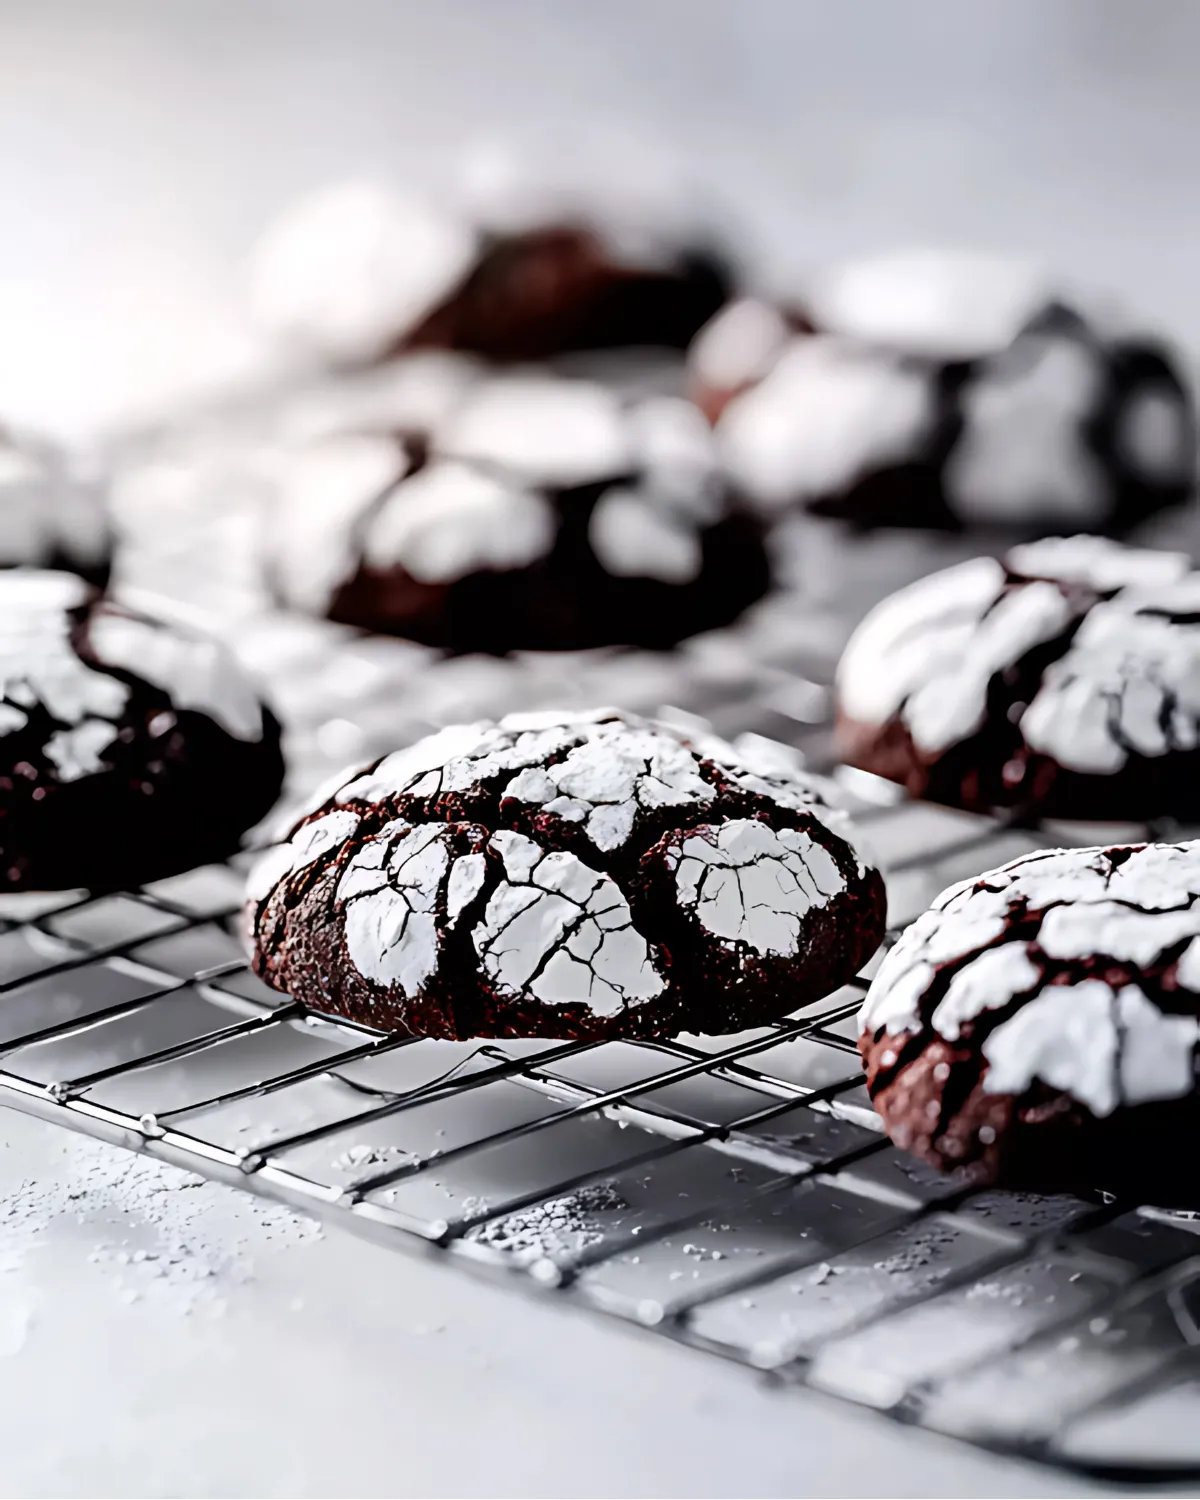
Chocolate crinkle cookies are the unsung heroes of Halloween baking. Their cracked tops resemble eerie patterns, making them an ideal backdrop for spider designs. Unlike plain sugar cookies, their rich chocolate flavor adds depth and warmth, perfect for chilly fall nights. The contrast of dark cookie against bright candy eyes creates a striking effect that’s both delicious and eye-catching.
If you enjoy experimenting, you can also branch out with variations like the Pumpkin Chocolate Chip Cookies or these Maple Pumpkin Cookies. Both can easily be adapted into spooky spiders, but nothing beats the classic charm of Spider Chocolate Crinkle Cookies. They’re simple, flavorful, and guaranteed to bring smiles—even if the spiders give you chills!
Making Spider Chocolate Crinkle Cookies Step by Step
Ingredients You’ll Need
One of the best parts about Spider Chocolate Crinkle Cookies is that you don’t need a long shopping list. Just a few essentials bring them to life:
- Chocolate crinkle cookies base: You can use homemade dough or store-bought cookie dough. If you’re pressed for time, refrigerated cookie dough works perfectly.
- Round chocolate candies: Truffles, Lindt balls, or chocolate-covered raisins make the perfect “spider bodies.”
- Candy eyeballs: Found in most baking aisles, these add personality to your spiders.
- Melted chocolate: Used as edible glue and for drawing spider legs.
If you’re looking for alternatives, swap candy eyeballs with mini white chocolate chips or even pipe white chocolate dots with melted dark centers. For a vegetarian-friendly option, make sure to use vegetarian chocolate or natural candy eyes. This recipe fits easily into the easy cookies category—simple ingredients, minimal prep, and maximum effect.
Step-by-Step Decorating Guide
Start by baking your chocolate crinkle cookies as usual. Once they’re out of the oven and still warm, gently press the back of a spoon into the center of each cookie to create a shallow indent. This will hold the spider’s “body.” Let the cookies cool completely before decorating.
Melt your chocolate in short bursts in the microwave until smooth. Place a small dollop in the indent and set a truffle or candy ball on top. Add two tiny dots of melted chocolate to attach candy eyes, holding them in place for a few seconds. To make the legs, spoon the remaining melted chocolate into a small bag, snip a corner, and pipe four curved lines on each side of the body. The key is to keep your movements steady and the piping hole small for cleaner lines.
A few tips: if your eyeballs won’t stick, let the chocolate cool for a minute before using it. If your legs look messy, practice on parchment paper first. And remember, no two spiders look exactly alike—that’s what makes them charming!
Variations & Creative Twists
Cookie Base Variations
The beauty of Spider Chocolate Crinkle Cookies is how easily they adapt to different flavors. While the classic chocolate crinkle cookies recipe provides that signature cracked look, you can swap the base for other favorites. Sugar cookies give a lighter, buttery option, while brownies make the spiders extra fudgy and dense. For a chewy texture, oatmeal chocolate cookies add a hearty bite without losing the festive feel.
If you’re baking for guests with dietary needs, consider using dairy-free or vegetarian chocolate options so everyone can enjoy the fun. You can even roll your cookie dough in powdered sugar before baking for extra contrast—the white cracks look especially eerie against the dark “spider” bodies.
Want to push the flavor further? Try using flavored dough, like peppermint chocolate or even pumpkin spice, for a seasonal spin. The cracked surfaces still deliver the creepy look, but the taste becomes a surprise twist. Each version keeps the “spider” magic alive while adding new personality to the batch.
Fun Spider Body Ideas
Once you’ve nailed the cookie base, you can have fun with the spider “bodies.” While chocolate truffles are the classic choice, plenty of alternatives work just as well. Mini peanut butter cups give a salty-sweet edge, Oreo balls add crunch, and chocolate-covered raisins create bite-sized spiders perfect for little kids.
For a colorful approach, use orange or white candy melts for the legs, or roll truffles in chopped nuts or sprinkles before placing them on the cookie. You can even scale them down—mini spiders made with smaller candies are just as cute, and they’re perfect for snack-sized portions at big parties.
One Halloween, I brought a platter with three versions: classic chocolate, orange candy melt spiders, and mini raisin spiders. Guests couldn’t stop picking favorites, and the variety made the table look festive and full of life. The best part? Every spider had its own “character,” which made them even more fun to share.
Serving, Storage & Party Presentation
How to Serve at Parties
Spider Chocolate Crinkle Cookies aren’t just fun to bake—they’re also a hit when it’s time to serve. For maximum effect, arrange them on a dark Halloween platter lined with a web-patterned napkin. Their cracked surfaces and candy eyes pop against a spooky backdrop. If you’re hosting a party, pair them with mugs of hot cocoa or a pumpkin punch bowl for a festive spread.
These cookies also make great additions to Halloween dessert tables alongside treats like popcorn mixes or candy bark. Guests love the mix of creepy and cute, and kids enjoy pointing out whose “spider” looks the scariest. When stacked neatly, they’re Instagram-worthy, but even scattered casually across a table, they bring Halloween energy to any gathering.
The best part? You don’t need to be a professional decorator. Even imperfect spiders get compliments because the playful design speaks louder than perfection. That’s why this crinkle cookies recipe is such a reliable choice—it’s as much about fun as it is about flavor.

Storage & Make-Ahead Tips
One of the best things about Spider Chocolate Crinkle Cookies is their flexibility. You can prepare them in advance, making party day less stressful. Store them in an airtight container at room temperature for up to five days, but keep them in a single layer if possible—stacking can squish the candy eyes or smear the chocolate legs.
If you’re baking ahead, freeze the plain crinkle cookies for up to three months and decorate them closer to serving time. You can also freeze fully decorated cookies, separated by parchment paper, and thaw them at room temperature before serving.
For classroom parties or large gatherings, portion the cookies into clear treat bags tied with festive ribbons. Not only does this make serving easier, but it also turns each cookie into a ready-to-go Halloween gift. Guests walk away with a tasty memory, and you get the satisfaction of creating a festive treat that looks as good as it tastes.
FAQs About Spider Chocolate Crinkle Cookies
How long do Spider Chocolate Crinkle Cookies stay fresh?
They stay fresh for up to five days in an airtight container at room temperature. To keep decorations intact, avoid stacking them.
Can I make them ahead of time?
Yes! Bake the cookies a couple of days ahead, then add the spider decorations on the day of serving to keep them looking fresh.
What can I use instead of candy eyeballs?
Mini white chocolate chips, white candy melts with piped black dots, or even tiny icing decorations work perfectly.
Can I freeze Spider Chocolate Crinkle Cookies?
Absolutely. Freeze either the unbaked dough balls or the decorated cookies. For baked cookies, separate layers with parchment paper and freeze for up to three months.
Spider Chocolate Crinkle Cookies are proof that festive doesn’t mean complicated. With simple ingredients and easy decorating steps, you can whip up a batch that’s both creepy and cute in under an hour. The chewy chocolate base makes them irresistible, while the spider design brings instant Halloween charm. Whether you’re baking for a classroom, party, or cozy night at home, this chocolate crinkle cookies recipe guarantees smiles and a touch of spooky fun. Try them once, and they’ll become a yearly tradition that everyone looks forward to.
Need more recipes? Follow me on Pinterest.
Print
Spider Chocolate Crinkle Cookies – 5 Amazing Easy Steps
- Total Time: 42 minutes
- Yield: 12 cookies 1x
- Diet: Vegetarian
Description
Spooky and fun Spider Chocolate Crinkle Cookies with chewy chocolate bases, truffle bodies, and candy eyes. Perfect for Halloween!
Ingredients
1 tube refrigerated cookie dough (or homemade crinkle dough)
12 round chocolate candies (truffles)
24 candy eyeballs
6 oz semi-sweet chocolate (or ¾ cup chocolate chips)
Instructions
1. Preheat oven to 350°F and line a baking sheet with parchment paper.
2. Scoop cookie dough onto sheet, spacing 2 inches apart. Bake 10–12 minutes.
3. Indent centers with a spoon while warm. Cool completely.
4. Melt chocolate until smooth. Add a dollop to cookie indents.
5. Place truffle candy in center. Attach candy eyeballs with chocolate.
6. Pipe chocolate legs from body outward, four on each side.
7. Let set before serving.
Notes
Use any cookie dough base, homemade or store-bought.
For variety, swap truffles with peanut butter cups or raisins.
Decorate with colored candy melts for festive spiders.
- Prep Time: 30 minutes
- Cook Time: 12 minutes
- Category: Cookies, Dessert
- Method: Baking
- Cuisine: American
Nutrition
- Serving Size: 1 cookie
- Calories: 101
- Sugar: 5g
- Sodium: 5mg
- Fat: 7g
- Saturated Fat: 4g
- Unsaturated Fat: 2g
- Trans Fat: 0g
- Carbohydrates: 8g
- Fiber: 2g
- Protein: 1g
- Cholesterol: 1mg

