Pressed Italian Picnic Sandwich Loaf Story & Intro
Why Pressed Italian Picnic Sandwich Loaf is Perfect for Gatherings
Hi, I’m Ethan—the cook, creator, and voice behind this cozy corner of the web.
The first time I made a pressed Italian picnic sandwich loaf, it completely changed how I approached group meals. I remember planning a casual park picnic with friends, and I needed something easy, portable, and still impressive. That’s when this pressed Italian picnic sandwich loaf became my secret weapon.
What makes this sandwich so special is how it brings people together. Instead of juggling multiple dishes, you slice into one beautiful loaf filled with colorful layers. Every bite delivers a perfect balance of meats, cheese, greens, and bold spreads. Even better, this pressed Italian picnic sandwich loaf travels incredibly well, making it ideal for outdoor meals.
Compared to typical picnic sandwiches recipes, this one stands out because of the pressing process. The flavors meld overnight, creating a cohesive, rich taste that feels intentional and gourmet. Plus, it looks stunning when sliced, which instantly elevates your picnic food menu.
If you enjoy recipes like my easy crowd-friendly wraps or quick lunch sandwiches, you’ll love how this loaf simplifies everything while delivering maximum flavor.
My Personal Story Behind This Sandwich Tradition
Growing up, I spent a lot of weekends outdoors with family—simple picnics, backyard gatherings, and road trips. Food always played a central role, but we needed meals that were both practical and satisfying. That’s where sandwiches came in, but they often felt repetitive.
Years later, I discovered the pressed Italian picnic sandwich loaf, and it instantly reminded me of those moments—but better. It took the idea of a sandwich for picnic occasions and transformed it into something creative and exciting.
Now, every time I prepare this pressed Italian picnic sandwich loaf, it feels like I’m recreating those shared experiences, but with a flavorful twist. It’s not just food—it’s a centerpiece that sparks conversation, laughter, and connection.
And honestly, once you make it, you’ll see why it never lasts long on the table.
How to Make a Pressed Italian Picnic Sandwich Loaf
Ingredients for the Perfect Italian Sandwich Loaf
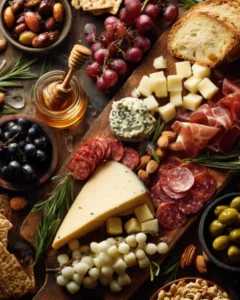
Creating a flavorful pressed Italian picnic sandwich loaf starts with choosing the right ingredients. Each layer plays a role in building that bold, satisfying bite. I always say this recipe feels like stacking flavor on flavor until it becomes unforgettable.
Here’s everything you need:
| Ingredient | Purpose |
|---|---|
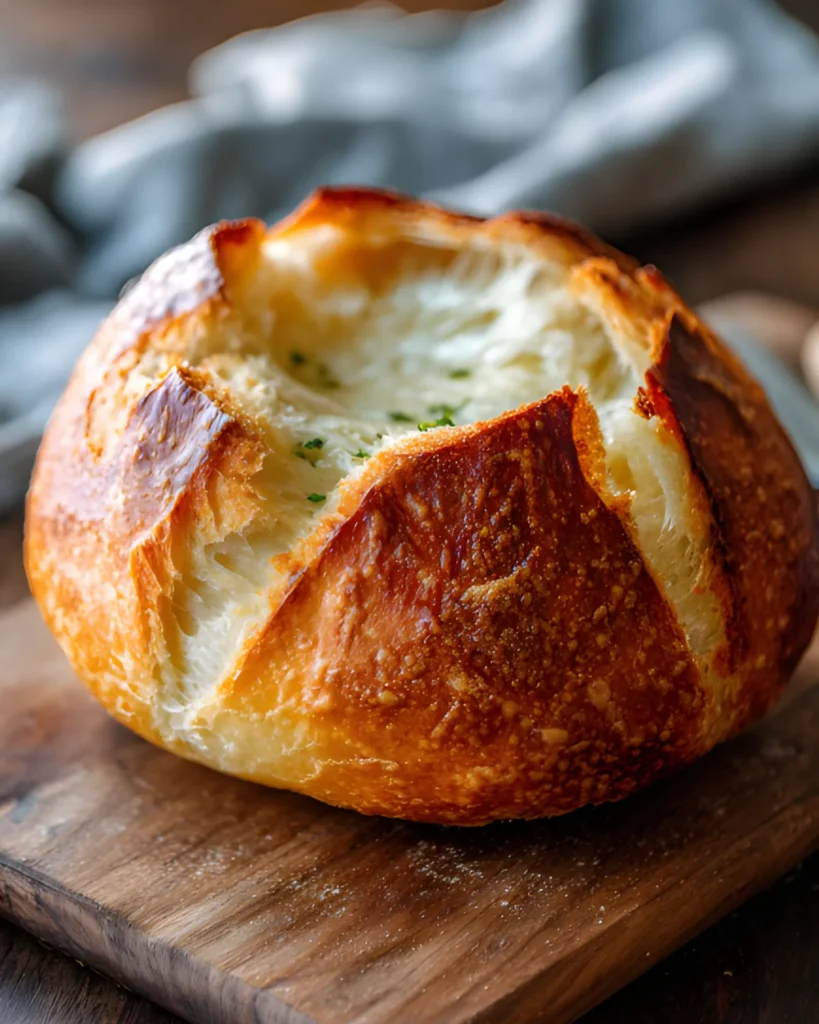
| Crusty round loaf | Holds structure during pressing |
| Olive tapenade | Adds bold flavor and prevents sogginess |
| Provolone cheese | Creates creamy texture |
| Salami & ham | Delivers savory richness |
| Roasted peppers & spinach | Adds freshness and color |
If you enjoy bold Italian flavors like in this pressed Italian picnic sandwich loaf, you might also love recipes from the lunch category on my blog, where simple ingredients shine just as much.
Step-by-Step Assembly and Pressing Method
Now comes the fun part—building your pressed Italian picnic sandwich loaf step by step.
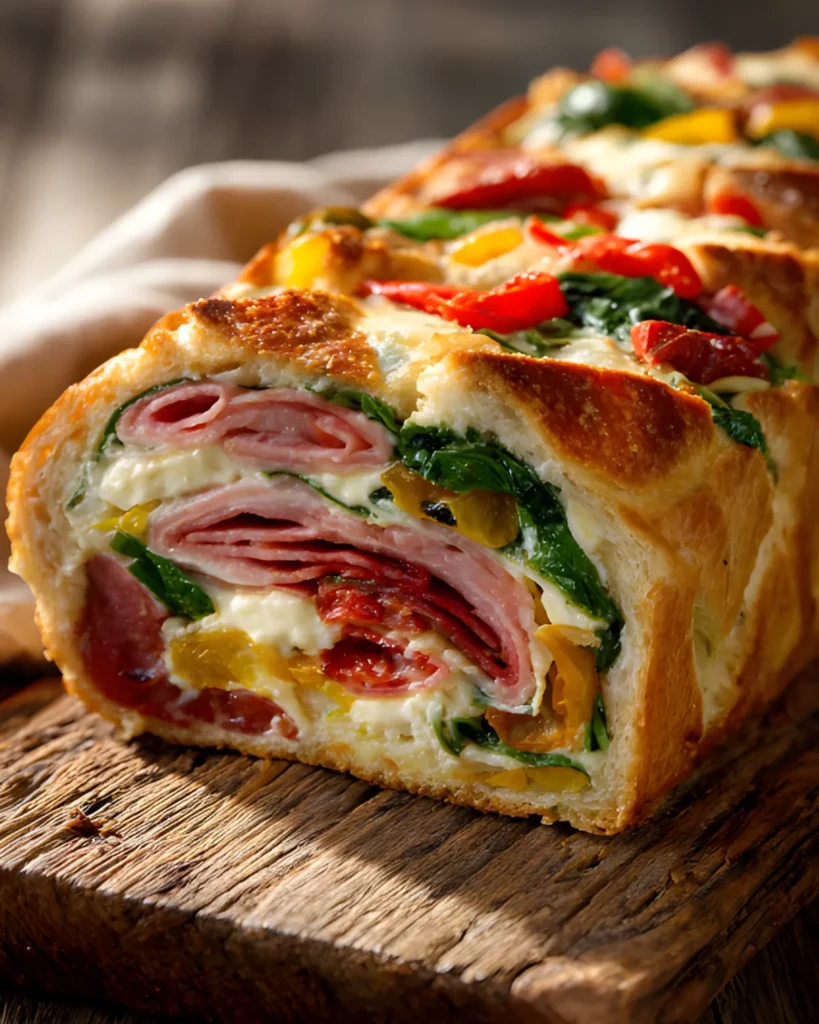
Start by slicing off the top of your bread and hollowing out the inside. This creates the perfect “bowl” to hold your layers. Then, spread a generous layer of tapenade on both the base and lid. This step locks in flavor and keeps the bread from getting soggy.
Next, layer your ingredients strategically. Begin with salami, followed by ham, roasted peppers, spinach, and cheese. Repeat the layers to create a loaded sandwich idea that feels hearty and balanced.
Once assembled, place the top back on and wrap the loaf tightly in plastic wrap and foil. Then press it down using a heavy skillet or canned goods. Refrigerate for at least 8 hours so the flavors fully combine.
For more make-ahead ideas like this pressed Italian picnic sandwich loaf, explore other easy meal prep recipes on the site.
The result is a compact, sliceable masterpiece that’s perfect for any picnic or gathering.
Tips, Variations, and Serving Ideas for Italian Picnic Sandwich
Expert Tips for the Best Pressed Italian Picnic Sandwich Loaf
Making a perfect pressed Italian picnic sandwich loaf doesn’t require complicated techniques, but a few smart tips make a big difference. First, always use slightly stale bread. Fresh bread feels soft, but it won’t hold up well during pressing. A firmer loaf keeps everything intact and gives you clean slices.
Next, balance moisture carefully. While ingredients like roasted peppers and spreads add flavor, too much liquid can ruin the texture. That’s why tapenade works so well—it adds richness while acting as a barrier. If you enjoy recipes with balanced textures like this, you might also like my easy homemade wraps that focus on structure and flavor.
Another key tip involves layering. Place oil-based meats like salami closest to the bread. This step protects the loaf and prevents sogginess. Then stack lighter ingredients like greens and cheese in the center to create a stable, compact build.
Finally, don’t rush the pressing process. The longer your pressed Italian picnic sandwich loaf rests, the better it tastes. Overnight chilling allows the flavors to blend into one cohesive bite, turning simple ingredients into something truly memorable.
Creative Variations and Customization Ideas
One of the best things about a pressed Italian picnic sandwich loaf is how flexible it is. You can easily adapt it to fit any taste or occasion.
For a vegetarian version, layer grilled zucchini, eggplant, hummus, and feta. This variation delivers bold Mediterranean flavor without any meat. If you prefer something spicy, swap in hot capicola, pepper jack cheese, and chili spread for a fiery twist.
You can also experiment with breakfast-style fillings. Add scrambled eggs, crispy bacon, and cheddar to create a morning-friendly loaf that works perfectly for brunch picnics.
Seafood lovers can try a lighter version with tuna salad, cucumber, and dill cheese. It feels refreshing while still satisfying.
If you’re exploring more loaded sandwich ideas, check out other creative recipes on the blog that bring the same level of flavor and convenience.
No matter which version you choose, this pressed Italian picnic sandwich loaf always delivers a colorful, crowd-pleasing result.
Storage, Make-Ahead Tips, and Nutritional Insights
How to Store and Transport Pressed Italian Picnic Sandwich Loaf
One of the biggest advantages of a pressed Italian picnic sandwich loaf is how well it stores and travels. After pressing overnight, keep the loaf tightly wrapped in plastic and foil. This step locks in moisture and preserves the structure.
If you plan to serve it later, store it in the refrigerator for up to 2 days. In fact, this pressed Italian picnic sandwich loaf often tastes even better the next day because the flavors continue to develop. That makes it perfect for meal prep or planning ahead for gatherings.
When transporting, keep the sandwich chilled in a cooler with ice packs. This ensures freshness, especially if you’re heading out for a picnic or road trip. Unlike many picnic sandwiches recipes, this loaf stays intact without falling apart or becoming messy.
For serving, unwrap and brush the crust lightly with olive oil for a fresh shine. Then slice into wedges using a serrated knife. If you love hosting ideas like this, you can explore more picnic-friendly recipes that pair perfectly with this loaf.
Nutrition Breakdown and Healthy Swaps
This pressed Italian picnic sandwich loaf delivers a satisfying balance of protein, carbs, and healthy fats. Meats and cheese provide protein, while vegetables add fiber and freshness.
Here’s a quick overview:
| Nutrient | Benefit |
|---|---|
| Protein | Supports energy and fullness |
| Fiber | Aids digestion |
| Healthy fats | Enhances flavor and satiety |
You can easily make this recipe lighter by using whole grain bread, lean turkey, or reduced-fat cheese. Vegetarian swaps like grilled vegetables or plant-based proteins also work beautifully.
FAQs
1. How long should you press a pressed Italian picnic sandwich loaf?
Press the sandwich for at least 8 hours, but overnight delivers the best flavor and texture.
2. Can I make a pressed Italian sandwich ahead of time?
Yes, this recipe is ideal for make-ahead meals. It tastes even better after sitting for a day.
3. What bread works best for a pressed sandwich loaf?
A crusty round loaf like boule or Italian bread works best because it holds its shape during pressing.
4. How do you keep picnic sandwiches from getting soggy?
Use spreads like tapenade as a barrier and layer oil-based meats near the bread to protect it.
Conclusion
Pressed Italian Picnic Sandwich Loaf combines convenience, flavor, and visual appeal into one unforgettable dish. It transforms simple ingredients into a compact, sliceable centerpiece perfect for any gathering. Whether you stick to the classic version or explore creative variations, this recipe guarantees bold taste and easy serving. Once you try it, it will quickly become a staple for picnics, parties, and meal prep.
Print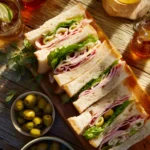
Pressed Italian Picnic Sandwich Loaf – Ultimate 5 Easy Secrets
- Total Time: 8 hours 15 minutes
- Yield: 6–8 servings 1x
Description
A bold and flavorful pressed Italian picnic sandwich loaf packed with meats, cheese, and veggies—perfect for gatherings and make-ahead meals.
Ingredients
1 large crusty round loaf
1/4 cup olive tapenade
4 slices provolone cheese
6 slices salami
6 slices ham or turkey
4 roasted red pepper strips
1 cup baby spinach
Olive oil
Instructions
1. Slice and hollow the bread loaf.
2. Spread tapenade on base and lid.
3. Layer salami, ham, peppers, spinach, and cheese.
4. Repeat layers and close loaf.
5. Wrap tightly and press with weight.
6. Refrigerate for at least 8 hours.
7. Slice and serve.
Notes
Use slightly stale bread for best results.
Press overnight for maximum flavor.
Customize with your favorite fillings.
- Prep Time: 15 minutes
- Cook Time: 0 minutes
- Category: Lunch
- Method: No-cook / Pressed
- Cuisine: Italian
Nutrition
- Serving Size: 1 slice
- Calories: 320
- Sugar: 3g
- Sodium: 780mg
- Fat: 18g
- Saturated Fat: 7g
- Unsaturated Fat: 9g
- Trans Fat: 0g
- Carbohydrates: 28g
- Fiber: 2g
- Protein: 14g
- Cholesterol: 35mg